Name Maintenance
Overview
Name Maintenance is used to add, edit and delete names .
Name Maintenance can be accessed from the Menu bar by navigating to Address Book – Name Search and doing one of the following:
- Click on New Name
- Search for a Name, Select the Name, Click Edit Selected
Name Maintenance can also be accessed from various screens that contain Name Fields (Name Promptables) by:
- Clicking on the Edit (pencil) button next to a name
- Or, by clicking on Search (magnifying glass) next to a Name, performing a search and then clicking Add New
Workflow
To Add a New Name :
- Navigate to the Address Book > Name Search screen (or click search from a Name promptable)
- Search for a Name
- Click New Name (or Add New if coming from a Name promptable)
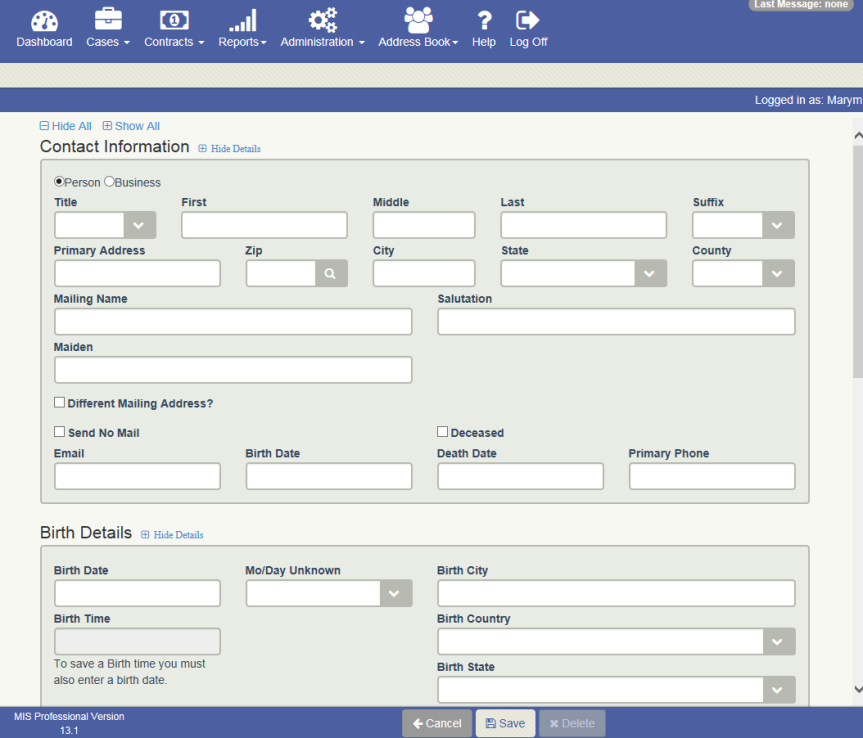
- Key in a First and Last Name for a ‘Person’
- Or, click on the Business radio button and key in a Name for a ‘Business’
- Key data into any of the other fields or select an option from the drop down menu
- The Zip field will perform an automated search to populate the City, State, and County (See Zip Field / Zip Code Search below)
- Click Cancel to abandon your changes
- Or, c lick Save to Save the Name record
To Add a Mailing Address different from the Primary Address
- With Name Maintenance open, check the box ‘Different Mailing Address?’
- A new row is added to the screen to allow entry of a Mailing Address
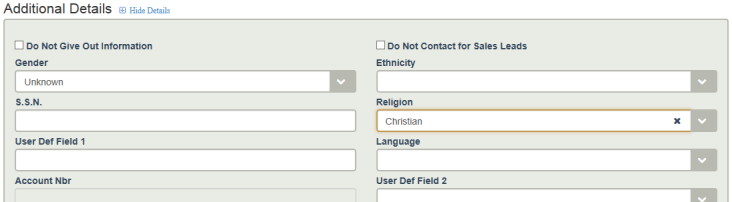
To flag the Name as Send No Mail or Do Not Contact for Sales Leads
- Add a death date and/or check the deceased flag (gets checked automatically when a death date is entered)
- The Send No Mail and Do Not Contact for Sales Leads gets checked automatically
- Or, if the Name is not deceased, click on Send No Mail and/or Do Not Contact for Sales Leads
- Click Save
NOTE: Removing the Death Date will not uncheck these 3 check boxes: Deceased, Send No Mail and Do Not Contact for Sales Leads.
To Edit an Existing Name:
- Navigate to the Address Book – Name Search screen (or click Edit from a Name promptable – also, if this is the case, skip to step 5)
- Search for a Name
- Select a Name
- Click Edit Selected
- Make changes to any of the fields
- Click Cancel to abandon your changes
- Or, click Save to Save your changes
To Enter a Birth or Death Date when the Month or Day is unknown:
- Enter the Birth or Death date in the date field. If the month is unknown, enter ’01’ for the month. Likewise, if the day is unknown, enter ‘01’ for the day. The year must be known and entered.
- Click the drop-down for the Mo/Day Unknown field next to the Birth Date (Birth Details Section) or the one next to the Death Date (Death Details Section)
- If the month is unknown, select ‘M’
- If the day is unknown, select ‘D’
- If both the month and the day is unknown, select ‘MD’
- Click Save
To Delete a Name:
- Navigate to the Address Book – Name Search screen
- Search for the Name to delete
- Select a Name
- Click Edit Selected
- Click Delete
- Message pops up: Are you sure you want to delete this Name?
- Click Cancel to avoid deleting the name
- Or, Click Delete to delete the name
Additional Information:
- If you try to delete a name that is in use somewhere in the system – you will receive a message: The Name you are trying to delete is in use so cannot be deleted
- The Social Security Number (S.S.N.) field format is based on the Country code.
- When adding a new name, the Gender field defaults to blank.
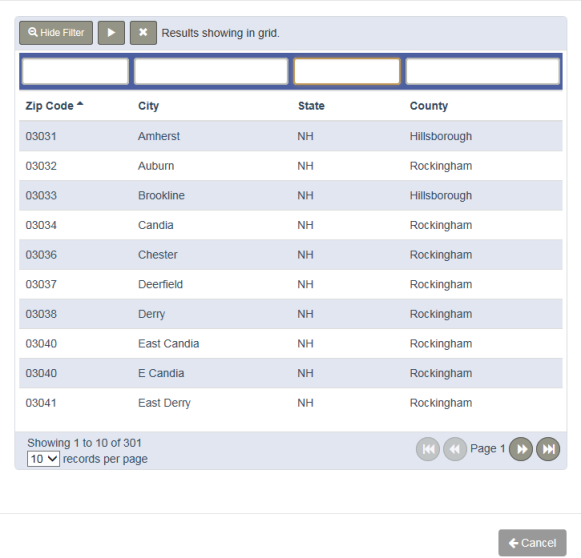
Zip Field / Zip Code Search
Users can enter a known Zip Code into the Zip field, or users can select the search icon (magnifying glass) to open the Zip Code Search screen to look up a Zip Code by searching on a known City , State, or County.
County Field
The “County” drop-down field allows users to select a county associated to the Person or Business Name selected, displaying the description of the County selected by the user.
Notes:
When any one of the following “County” fields are updated, all “County” fields are updated:
- Name Maintenance - Contact Information Section County Field
- Death certificate Screen Decedent - Addresses County Field
- Case Summary - Decedent name Information county Field
- FAP Vital Statistics - Address Information county Field
The counties displayed in the “County” field for selection are determined by the following:
- If for any Person or Business name, when the State drop-down field is empty, the “County” drop-down field will list all those counties that are not associated to a State and are active on the County Code Maintenance screen.
- If for any Person or Business name, when the State drop-down field is populated, the “County” drop-down field will list all those counties that are associated to the selected State and active on the County Code Maintenance screen.
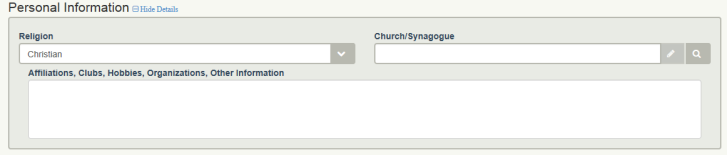
Religion Field
The Religion field will auto populate to the Personal Information screen Religion field. Any updates to the Religion field on either screen (Name Maintenance or Personal Information) will update each other.
Workflow
1. Enter a Deceased Name or Beneficiary Name. While in Name Maintenance, click on the Religion field drop down
2. Choose the religion
3. Save Name Maintenance
4. Complete the required fields on First Call and Save
5. Go to Personal Information screen
6. The Religion field is populated
Important Information
- If user saves a value for Religion on the Name Maintenance screen for the deceased/beneficiary then on Personal Information screen the Religion field would be auto-populated with this value if it it’s empty.
- If user saves a value for Religion on the Personal Information screen then this value will auto-populate on the Name Maintenance screen if it was not present.
- The user can update the Religion value on both screens independently. On updating the value in one screen it will not update the value on the other screen if it is already populated.
- If an existing name having a religion is added to a case as a Deceased / Beneficiary, then when the case is saved; the religion on the Personal Information screen should be updated.